Introduction
After you have set up your own live streaming server through the SRS Droplet you received multiple links to publish your stream. You can use the build in players or use the links in VLC for example for the various sources.
But what if you would like to embed your HTTP-FLV, HLS or WebRTC stream straight into your WordPress site?
In this tutorial, I will show you how you set up your WordPress and SRS Player plugin to stream right through your website for viewers to watch.
Prerequisites
To complete this guide, you need:
- OBS installed, following the instructions here to download and install OBS.
- Having your SRS Server set up, following the instructions here.
- Having your WordPress website set up.
This guide will use placeholder your_public_ipv4 and your_domain_name throughout for streaming URLs. Please replace
them with your own IP address or domain name.
Step 1: Download the SRS WordPress Plugin
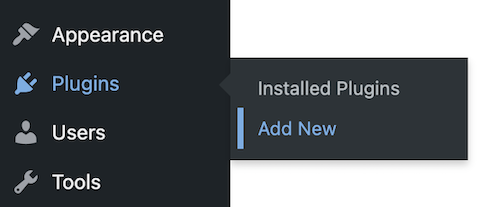
After you logged in your WordPress website, navigate to Plugins, click the Add New button.
Search for SRS Player or follow this link.
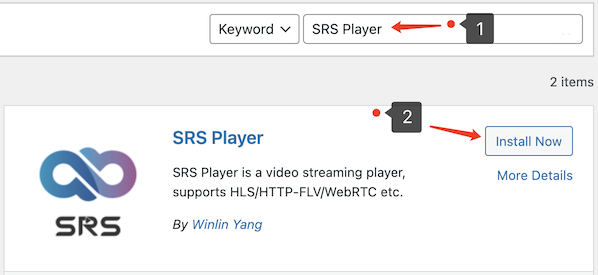
Click the Install Now button and after the Installing prompt, click Activate. The plugin should now be active.
Step 2: Embed the WordPress Plugin shortcode into your post or page.
Copy the shortcode from your SRS server of the protocol you wish to embed.

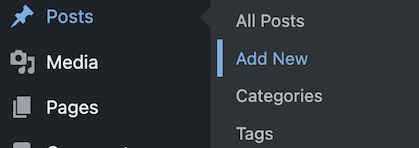
Within WordPress, create a new Post or Page.
Create a new shortcode on your post or page.
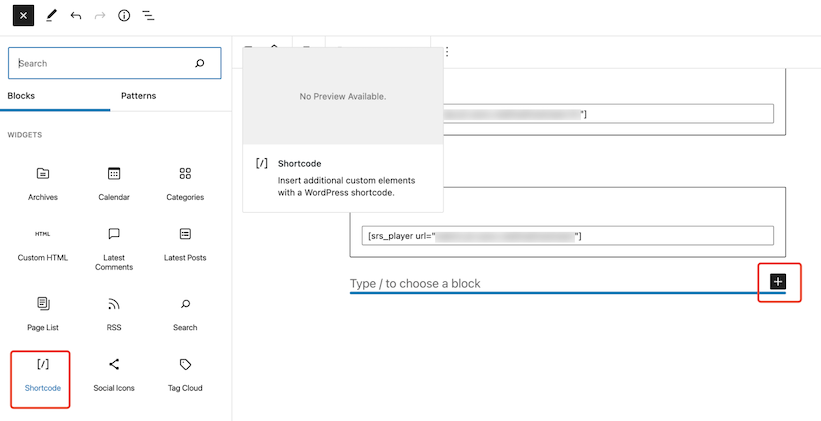

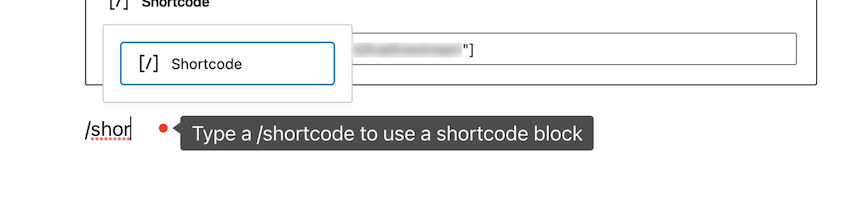
Use the shortcode of the protocol you would like to embed by using one of the following shortcodes:
- HLS
[srs_player url="https://your_public_ipv4/live/livestream.m3u8"] - FLV
[srs_player url="https://your_public_ipv4/live/livestream.flv"] - WebRTC
[srs_player url="webrtc://your_public_ipv4/live/livestream"]
Click the Publish button and check your new page.

Your player should show up on your WordPress post or page.
Note: Basic setup of the SRS server does not activate HTTPS. If your WordPress website is HTTPS, it will be unable to show the video coming from a HTTP server. Setting up HTTPS on your server requires additional steps, please follow set-up HTTPS for SRS tutorial.
Step 3: Resize the player on your post or page.
By default the player has the size of the output size you determined in your OBS stream settings. This can cause your
WordPress layout to look off. To resize your player add width="your chosen width" in your shortcode.
For example, if I want my player to have a width of 320, your shortcode would look like this:
[srs_player url="https://ip/live/livestream.m3u8" width="320"]
Your player should have a width of 320 and a height with the corresponding aspect ratio of your stream.
Step 4: Set up your SRS server as HTTPS (optional)
If your WordPress website is protected by a SSL certificate and your initial setup of your SRS server is not, your video will not play on your website.
Please follow these instructions to setup an SSL certificate for your SRS streaming server. After this setup your video will play on your website.
Cloud Service
At SRS, our goal is to establish a non-profit, open-source community dedicated to creating an all-in-one, out-of-the-box, open-source video solution for live streaming and WebRTC online services.
Additionally, we offer a Cloud service for those who prefer to use cloud service instead of building from scratch. Our cloud service features global network acceleration, enhanced congestion control algorithms, client SDKs for all platforms, and some free quota.
To learn more about our cloud service, click here.
Conclusion
In this tutorial you’ve learned to set up the SRS WordPress plugin and embedded a stream on your post or page. If you have further questions about SRS, the wiki is a good place to start.
Contact
If you’d like to discuss with SRS, you are welcome to discord.
