Introduction
aaPanel is a simple website and server management tool. It is similar to cpanel.net, while aaPanel is free, open source and easy to develop plugins for media servers.
In this tutorial, you will learn how to deploy a live streaming media server, using aaPanel. If you have websites deployed with aaPanel, it's also possible to deploy an extra media server to power your website with live streaming service, for example, to enable live streaming feature for your WordPress website.
Prerequisites
To complete this guide, you should have:
- A linux server, with aaPanel installed. Please use a CentOS 7+ or Ubuntu 20+ and install aaPanel on it by using command here.
- NGINX based framework, if you also need to install websites. Oryx requires NGINX to proxy to our backend services.
- A DNS domain name, if you want to use HTTPS.
Step 1: Install aaPanel
If you don't have aaPanel installed, please follow this tutorial. Highly recommend install aaPanel on Ubuntu 20+:
wget -O install.sh https://download.bt.cn/install/install-ubuntu_6.0.sh && sudo bash install.sh ed8484bec
After installation, you will get a url, username and password for login, for example:
==================================================================
Congratulations! Installed successfully!
==================================================================
aaPanel Internet Address: http://159.223.85.157:7800/a954fbf9
username: f6nka6v8
password: 4b43d253
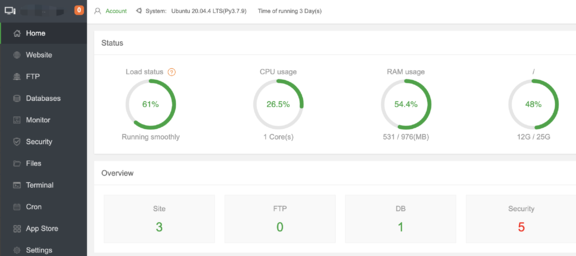
Visit the url in a browser, as demonstrated below:
You might develop your website with WordPress, however it's optional. In the next step, let's set-up a media server with aaPanel for live streaming.
Step 2: Install Oryx
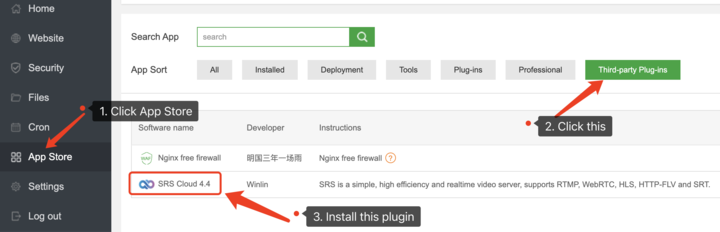
There are two ways to install Oryx. If you find the Oryx plugin in App Store, you could install it from
there, as shown in the following picture:
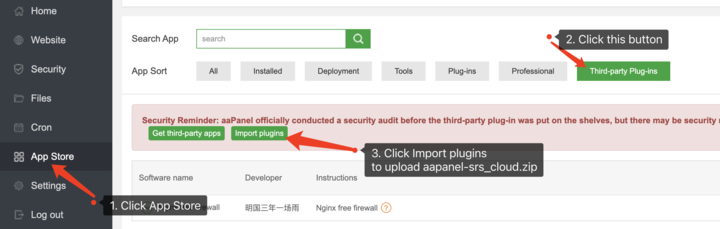
If not found in App Store, you could also download the latest version of the plugin in the oryx repository on Github: aapanel-oryx.zip. Then you could upload the zip file and install the plugin, as demonstrated below:
Both approaches will lead you to a installation guide, like this:
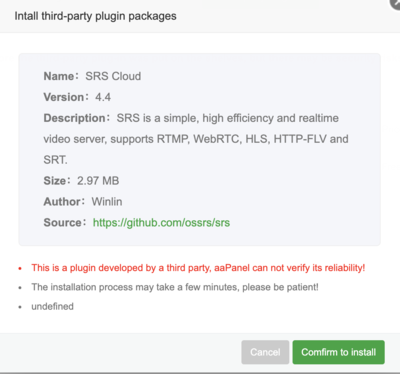
Please click on Confirm to install to continue the plugin installation. In the next step, we will set-up Oryx and
install some dependencies.
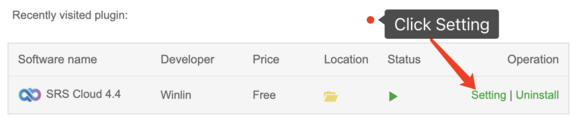
Step 3: Setup Oryx
To set-up Oryx, please click the Setting button under Operation field:
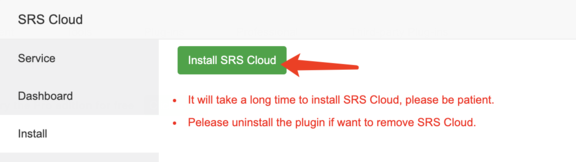
Then click on Install Oryx to install the required softwares:
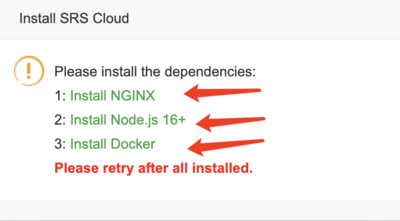
Oryx requires NGINX, Nodejs and Docker, please install all of them:
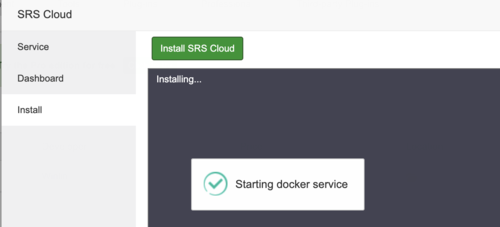
After installing all dependencies, continue to install Oryx:
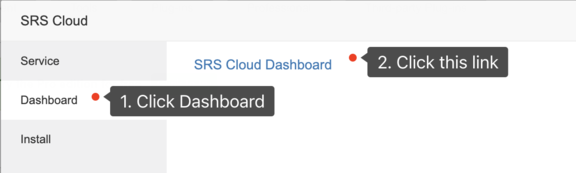
When completion all the set-up, click on Dashboard and then visit the Oryx Dashboard via the link on the page:
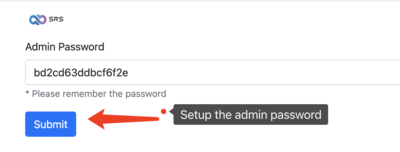
Then set-up the admin password:
You could follow the tutorials to use Oryx:

Now we have a media server. In the next step, we publish a live stream to the server and play it through WordPress.
Step 4: Publish and Play Live Stream
Please open the instruction page here: Scenario > Streaming > OBS or vMix
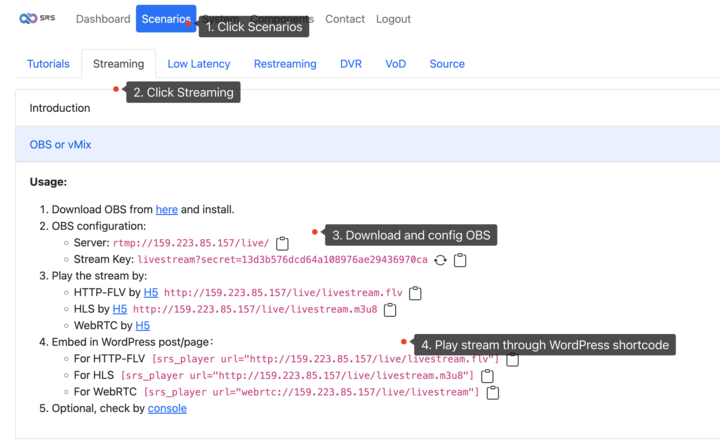
We recommend using OBS. You can download OBS from here, and configure it from
Settings > Stream:
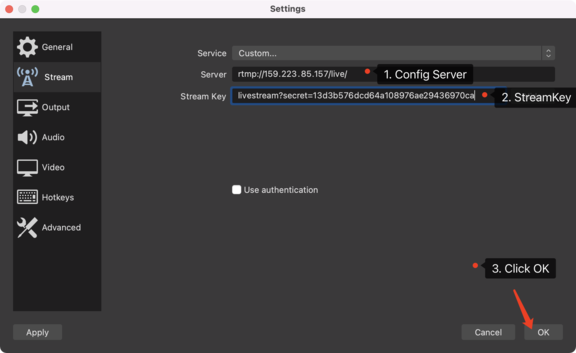
Then, click on the Start Streaming to publish a live stream to your server. You could play the HTTP-FLV, HLS or WebRTC
either use a browser, or through WordPress:
[srs_player url="http://159.223.85.157/live/livestream.m3u8"]
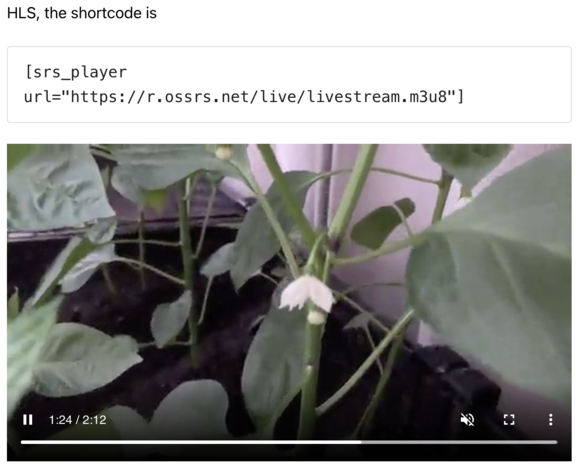
For details about WordPress shortcodes, please read this tutorial: how to publish your SRS livestream through WordPress. There is also a live demonstration here SRS Player Demo.
Cloud Service
At SRS, our goal is to establish a non-profit, open-source community dedicated to creating an all-in-one, out-of-the-box, open-source video solution for live streaming and WebRTC online services.
Additionally, we offer a Cloud service for those who prefer to use cloud service instead of building from scratch. Our cloud service features global network acceleration, enhanced congestion control algorithms, client SDKs for all platforms, and some free quota.
To learn more about our cloud service, click here.
Conclusion
In this tutorial, you create a live streaming service with aaPanel, publish a stream with OBS and then play it through a browser or WordPress. If you have further questions about SRS, the wiki is a good place to start.
Contact
If you'd like to discuss with SRS community members, you are welcome to join us on discord.
